How to cut straight edges in a round element

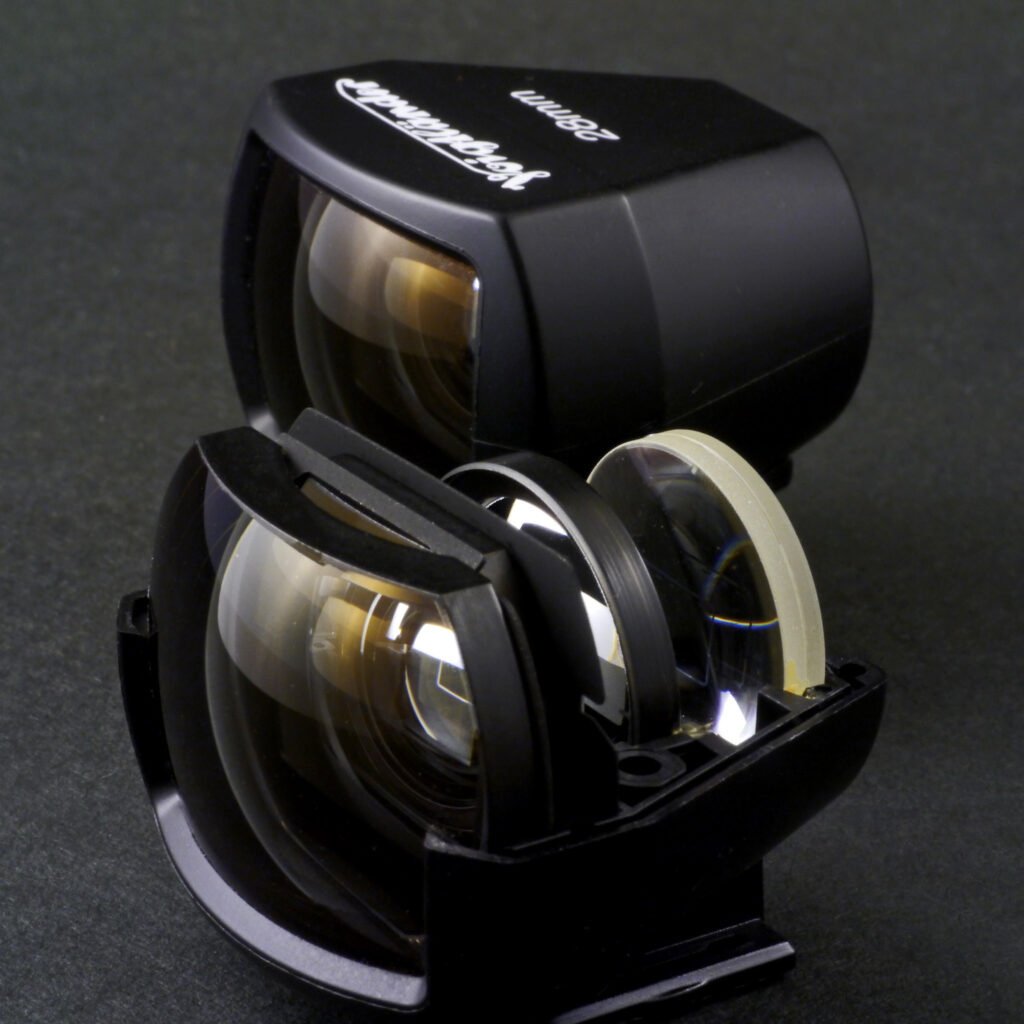
The above photograph is of an external finder for a rangefinder camera with the cover removed so as to show its inner. You can see that a number of optical elements and a mask for projecting a frame are arranged in neat order. You should also catch your eye that the top edge of the first concave element on the subject side is cut in a straight line, which accommodates the design of this external finder. So, how do you think this straight edge was cut?

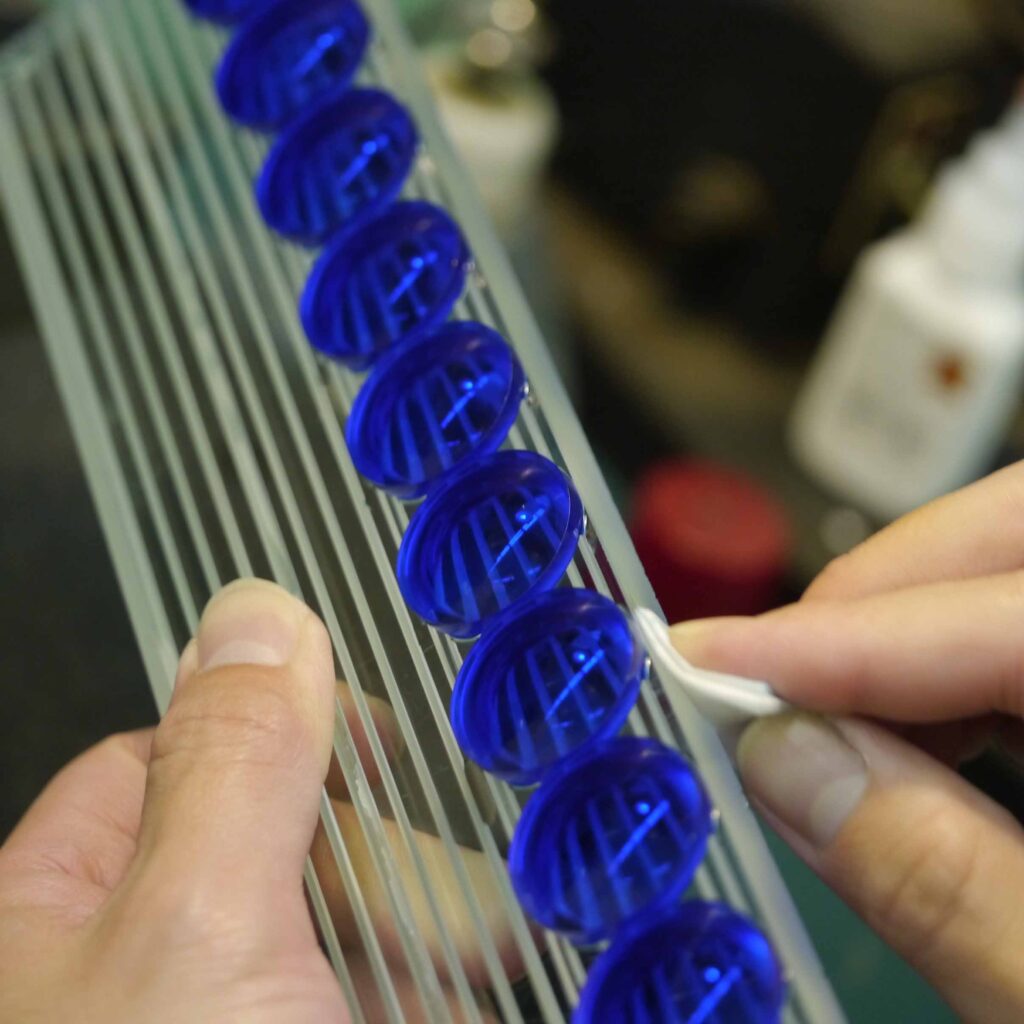
To cut elements, a high speed rotary diamond cutter is used, but the most important point of this process lies in accurately positioning the blade’s initial cut. The elements are placed in specified positions on a glass plate, but unless firnly immobilized, they will be shot out the instant the blade contacts them, therefore the elements must be mounted securely. Setup is done carefully and skillfully by hand. Because of the concentration required to do this, the process is managed by workers with exceptional skill and sense.

The elements are coated with a blue protective agent to keep surfaces from being scratched while cutting. To strip off this coating and the adhesive that holds the elements on the glass plate, the plate is soaked, elements and all, in solvent after cutting is complete.


The elements come out of this process with clean straight-cut edges. The edge faces are then coated to block reflecting light and assembled into the finder. Typical optical elements are left round most of the time, but this straight edge is indispensible for the mechanical design of finder elements and optical products like prisms. To meet both the strict optical performance and esthetics requirements of individual high-end optical devices, cutting processes are set up by hand. This not only improves the finished precision of the lenses and prisms but also embodies these products with a piece of our soul. That is the mindset we have at Cosina when manufacturing products.